
Designing a succulent bridal bouquet might sound easy at first. But once you get into it, you’ll quickly come to the conclusion that it is far from it.
Wedding bouquets require extra caution as they serve a very important purpose. Not only that, but you’d hate for the thing to look bad for such a huge occasion.
That’s why we’re here to tell you all about how to make one. Don’t go anywhere as we’ll start right now.
Things You’ll Need

First, let’s talk about what you’ll actually need to make it. You’ll need flowers; of course. But not just any flower, you’ll need succulents. Fortunately for you, succulents can be found literary everywhere. Most florists have them and chances are you’ll find one where you live.
The biggest concern might be the fact that most succulents bloom in late spring or early summer. But you shouldn’t worry too much as variations of the flower also bloom in the colder months.
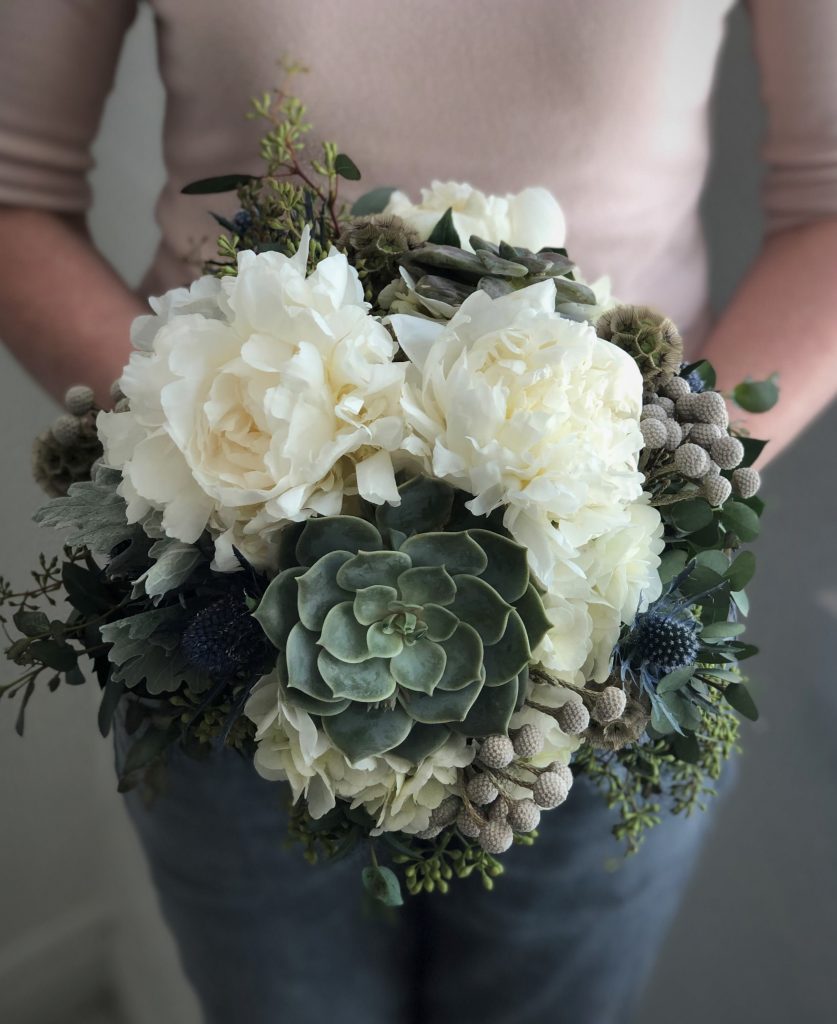
You’ll also need some floral tape, some ribbons, and the desire to continue reading this article to find out how to make one. You can also get other variations to accompany the bouquet. Seeing as a bouquet is a combination of flowers and not just one type, we are going to go with pink roses as they work best with succulents.
With all that said, let’s get into making the thing.
Step One
You won’t need to trim the succulent, but you will need to trim down the pink roses. Whenever trimming, you’d hate to chop off all the greenery and instead look to leave some for added contrast.
Make sure not to do this mistake as it will hinder the look of the bouquet.
Steep Two
Whenever making a bouquet, it’s all about the details. You should look to make the bouquet as special as you can. And to do that, we’ll you will need to add some details.
For this, you can wire the flowers, the roses, by wrapping a wire through them. To make sure the thing sticks, make sure to pierce the wire on the thick part of the stem and go downwards.
The wires will help you later on if you want to attach something else. Not only that, but they hold the roses together and give them added support.
Step Three
Now it’s time to get the floral tape out and start wrapping it over the roses. We still haven’t gotten to the succulent part, and this one also applies to the roses.
We add the floral tape to give the bouquet some character. There are plenty of ways to wrap the tape around the flowers, but we suggest you do it tightly. You would hate it if any loose tape starts falling off.
Step Four

We’ve finally gotten to the succulents. Seeing as succulents grow in pots, the first thing you’ll need to do is remove them from the pots. There will be plenty of dirt, so make sure to remove it.
You can use a brush if you want to be extra careful about it. Once you’ve done that, grab the same wire and do the same thing with the succulents.
One thing though as the stem of the flower is more fragile than the one of the roses. So you’ll need to be extra careful when doing this. Not only that, but succulents can grow in different sizes. So chances are you’ll have plenty of smaller ones to look after. The smaller the flower, the harder to wrap the wire. But if you do manage to pull it off, then you’ll give the succulents a lot of support and make it easier to manage.
If you want to avoid working with smaller succulents, then you’ll need to buy the flower from a reputable florist that specializes in succulents. For that, make sure to visit succulentmarket.com.
Step Five
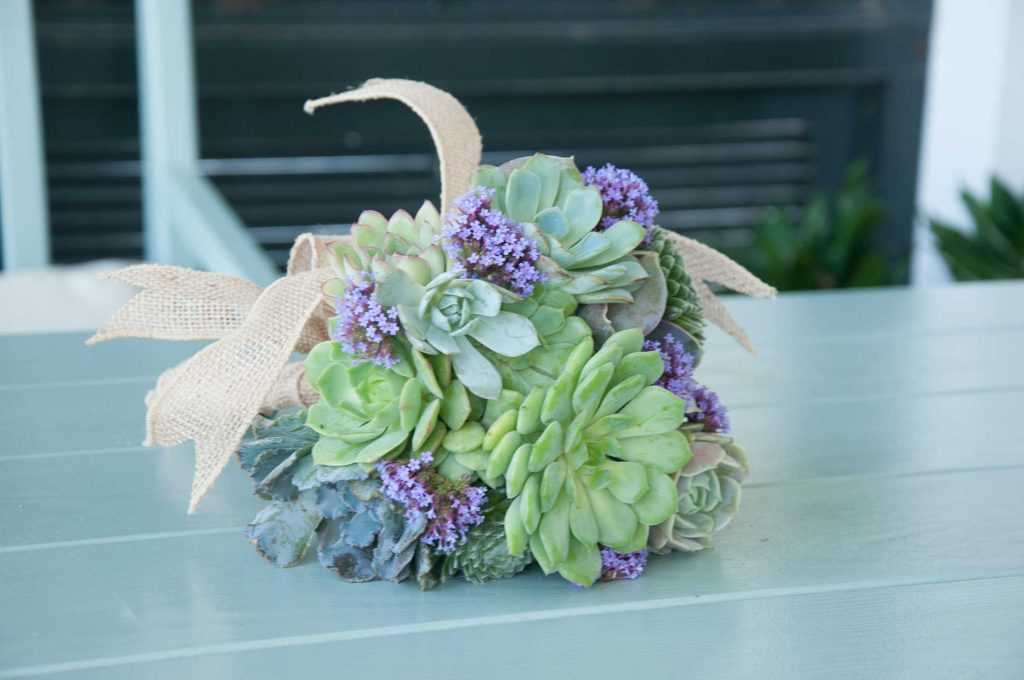
Now that you’ve wired both succulents and roses, it’s time to do the arrangements. This is the fun part is you can really get creative with this one. There are so many options to choose from in terms of styles. But we always suggest the succulents to be the focal point of the bouquet.
To do that, you’ll need to do a bit of brainstorming. The easiest, and best approach, is to simply place the biggest ones in the center. Going from the center is always the best way to approach a bouquet, and we will also do that.
Place the biggest succulents in the center and the smaller ones around them. Once you’ve got a few of them together, you’ll need to wire them or tape them, depending on which works best for you, to make them stick together and not fall apart. You can do that by placing the wire or tape just underneath the flowers. Once you’ve done one section, work on the next one and so forth.
When it comes to the roses, we advise you to scatter them all over the place. Instead of walling off the succulents with the roses, it will look better if you just scattered them.
This way you are giving the bouquet a base to hold onto and you won’t be suffocating the succulents, rendering them obsolete in the process.
Step Six
Once you’ve wired the bouquet again, you’ll want to cover the base with wrapping paper to give the bouquet a bit of character and to also cover the wires. This is the easiest part as all you need to do is simply wrap the base of the bouquet.
Step Seven
Remember the part where we talked about details, we’ll let’s do that right now as the final step of the bouquet. Most bridal bouquets have ribbons on them. And they certainly work the best when it comes to details.
So make a few ribbons, add them to the bouquet, and voila you’ve got yourself a bridal succulent bouquet. Feel free to give the bouquet your very own touch or anything else that you might feel will give it more character.


 – 2023 Guide")
")


